What is a DKIM Signature: A Compete Guide to DKIM Signatures
by
Last Updated: 7 min read
by
Last Updated: Domain Keys Identified Mail (DKIM) is an email authentication method that lets an organization take responsibility for a message that was sent. It uses public-key cryptography to digitally “sign” emails, proving to recipients that the message was sent by the domain owner. Receivers can check the signature against their domain’s published public key to verify the signature.
This article will examine DKIM in detail and will give you an overview of how this email authentication method works.
Key Takeaways
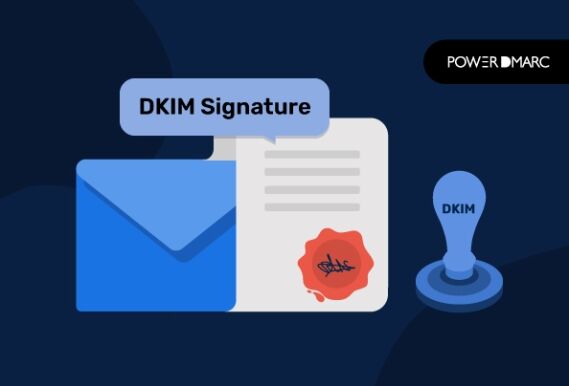
DKIM signature is a cryptographic signature that the DKIM protocol creates for each message sent to recipients, as well as a domain signature that is added to the message header.
This signature is used by the receiver to verify that the message was actually sent by the domain owner and not someone else. It also verifies that the message has not been tampered with along its journey from sender to receiver.
If it does not match, then either:
In such cases of mismatched signatures, DKIM will prevent those emails from being delivered to their intended recipients because they won’t be able to validate them as legitimate messages from your brand.
DKIM signatures work by inserting a digital signature into the header of an email. This signature can be verified by the receiving server and used to determine whether or not an email has been tampered with during transit.
DKIM uses public-key cryptography, which relies on a pair of keys: one private and one public. The public key is distributed to anyone who wants it, while the private key is kept secret (usually by the owner).
When you sign an email using DKIM, your private key is used to create a hash of the message’s content and then encrypt that hash with the receiver’s public key. This encrypted hash is then inserted into the header of your message, where it can be validated by the receiver.
DKIM signatures are generated using two cryptographic keys, one public and one private. The public key is published in DNS, while the private key is kept secret.
When an email is signed, the private key is used to generate a hash of the message. This hash is then encrypted with the public key and sent along with the message itself.
When the recipient receives this information, they use their private key to decrypt the hash and verify that it matches the original content of the message.
A DKIM signature consists of two parts: a header and the body. The header contains information about the sender’s identity, including their email address and public key. The body contains the actual message that was sent.
1. The sender generates a message with a unique identifier called a cryptographic hash function (usually SHA-256). This unique identifier is called a DKIM-Signature header field and contains information about who signed it and when they did so.
2. The sender adds additional header fields to the message that contain information about:
3. Finally, recipients who want to verify these signatures will use their copy of their sender’s public key from their DNS records or an intermediate service such as SenderID or Mailgun, then use it to validate any messages with DKIM headers attached.
This is an example of how a DKIM signature record might look:
| DKIM-Signature: v=1; a=rsa-sha256; s=jun2005.eng; c=relaxed/relaxed; d=example.com; s=dkim; t=1526555738; bh=mhU6OJb5ldZf+z/pX9+0Nc4tj/lmyYHWbR8LgI2Q=; h=To:From:Subject:Date:Message-ID:MIME-Version:Content-Type:Content-Transfer-Encoding; b=s1sdZCzdX9vxocsMSlT7cOrYixl1g8wfkdzrVe7BGN6ZdPV9xu2A |
v= This tag tells us the version of the DKIM.
a= This specifies the algorithm used by the signer to generate its public key. It can be one of RSA1_5, RSA-SHA1, or RSASSA-PSS. If this tag is missing, then RSA-SHA1 is assumed.
c= It specifies the canonicalization algorithm used to generate hashes from header fields as required by [BCP14]. This is followed by a comma-separated list of 1 or more canonicalization algorithms (e.g., “c=relaxed”). If this tag is omitted, then relaxed canonicalization is assumed.
d= It specifies which domain name should be used when generating signatures for messages sent out by this server (or another recipient).
s= The “s” tag is the selector string, which is used by a receiving server to determine what public key should be used to verify the signature.
t= The timestamp tag is used to record when the signature was created and is typically represented as a Unix timestamp (the number of seconds since January 1, 1970).
bh= This tag represents the body hash, which is an encrypted version of your message’s contents (including headers). This helps prevent tampering with messages after they’ve been signed by DKIM and before they reach their intended recipients.
h= The header hash value contains all headers in their entirety (including those signed by Sender Policy Framework or DomainKeys Identified Mail) except for those that have been explicitly excluded by including them in an exclude list. This value must be calculated using SHA-1 or MD5.
b= The “b” tag is the base64-encoded representation of a cryptographic hash function on the canonicalized body of the message (ie., after MIME encoding has been removed).
Some steps can be taken to ensure that the DKIM signature is valid:
DKIM Signature verification is complicated. It requires a lot of expertise to set up and maintain, and it’s often used in conjunction with other systems like SPF, which are also complicated.
As a result, most email marketers use a DKIM signature verification tool such a DKIM record checker to check their DKIM signatures. This tool checks the DKIM keys that have been added to an email and verifies them against a public database. If the keys are valid and trusted, then the email can be considered legitimate.
This is important for several reasons: firstly, it ensures that your emails aren’t flagged as spam by ISPs or ISPs’ customers; secondly, it allows you to avoid having your domain blacklisted by other domains (this is called domain poisoning); finally, it helps ensure that your emails don’t get caught up in any kind of man-in-the-middle attack.
DKIM is a promising solution that allows an organization to validate the legitimacy of emails, especially those from outside senders. When applied consistently across a messaging environment, it provides recipients with a high degree of confidence that an email was sent by an authorized representative of the sender’s domain. However it is important to note that while DKIM provides a verification mechanism, it isn’t enough to protect against email fraud attacks like spoofing and phishing. For that, a DMARC policy set to reject is mandatory.
Email authentication is a necessary part of any business’s digital marketing strategy. With so many emails being sent and received every day, it’s easy for your brand to get lost in the shuffle. But with email authentication services from PowerDMARC, you can ensure that your emails are seen by the right people.
Our email authentication solution will help you:

 Best Hosted DKIM Providers