Happyfox DKIM, DMARC, and SPF Setup Guide

by
Last Updated:
5 min read


by
Last Updated:
Key Takeaways
If you’re using Happyfox to manage your help desk operations and send support emails to your customers, and haven’t set up domain authentication yet, this guide will walk you through the full process.
Setting up proper email authentication (SPF, DKIM, and DMARC) is vital for Happyfox users. These three records work together to protect your domain from spoofing, improve email deliverability, and ensure your support messages safely land in your customers’ inboxes while meeting the strict requirements of major mailbox providers like Gmail and Yahoo.
Happyfox is a comprehensive help desk and customer support software designed to help businesses track tickets, build automated workflows, and manage multi-channel customer communications.
When you accurately configure the necessary protocols for Happyfox, you will see immediate benefits:
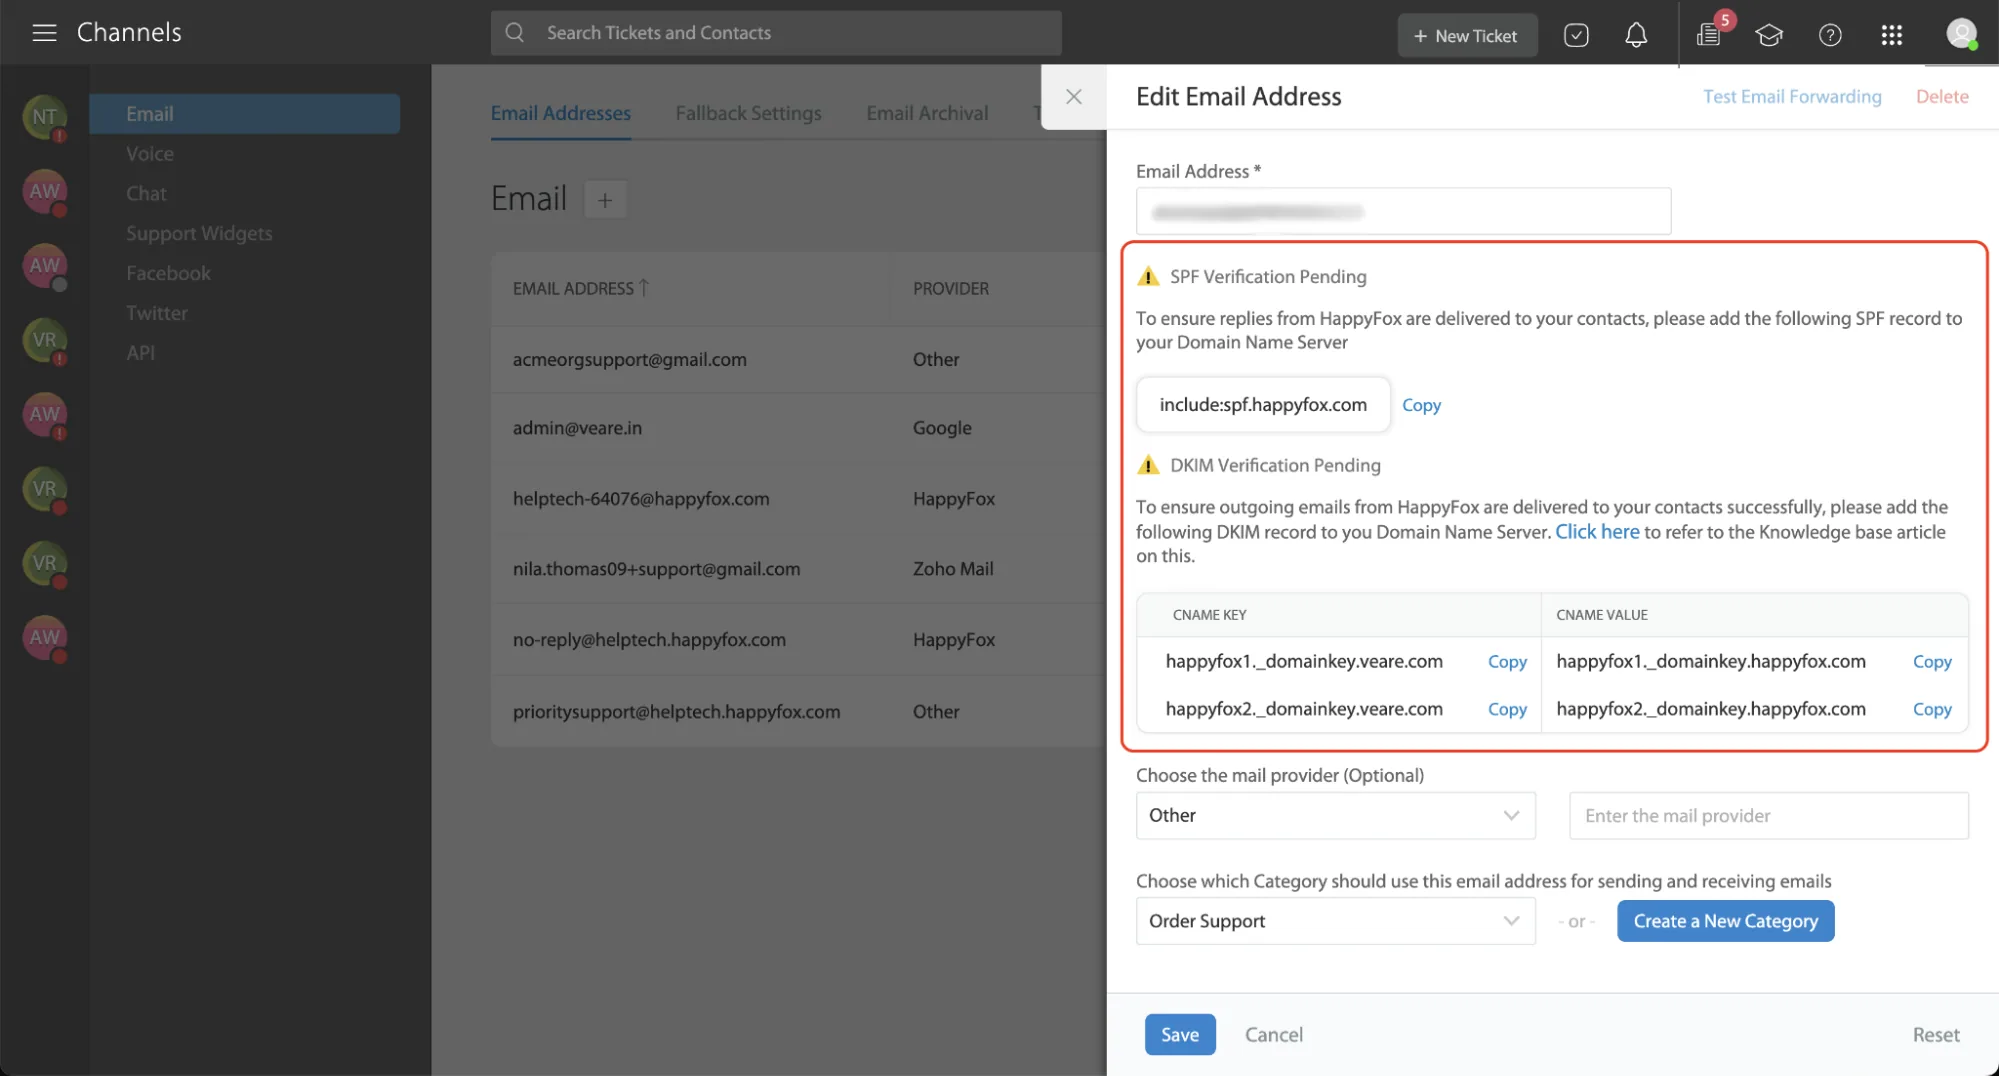
Source: Happyfox email authentication guide
To begin, you will need access to two things: your Happyfox agent portal and your domain’s DNS management console.
Before updating your DNS, verify where your Happyfox account is hosted.
(Note: If you are unsure, click the support icon in the top rig ht of your Happyfox Agent portal to verify).
Head over to your DNS provider (e.g., Cloudflare, GoDaddy, Namecheap, Route 53) where your domain is managed, and access your DNS settings.
If you do not have an existing SPF record, create a new TXT record:
(Note: If your DNS already has an SPF record for other services like Google or Outlook, do not create a new one. Simply add the Happyfox include statement, e.g.: include:spf.happyfox.com to your existing record right before the ~all tag.)
If you’re managing several sending sources and getting close to the limit, our Hosted SPF solution is worth looking into, and you can check your current record with PowerDMARC’s SPF checker.
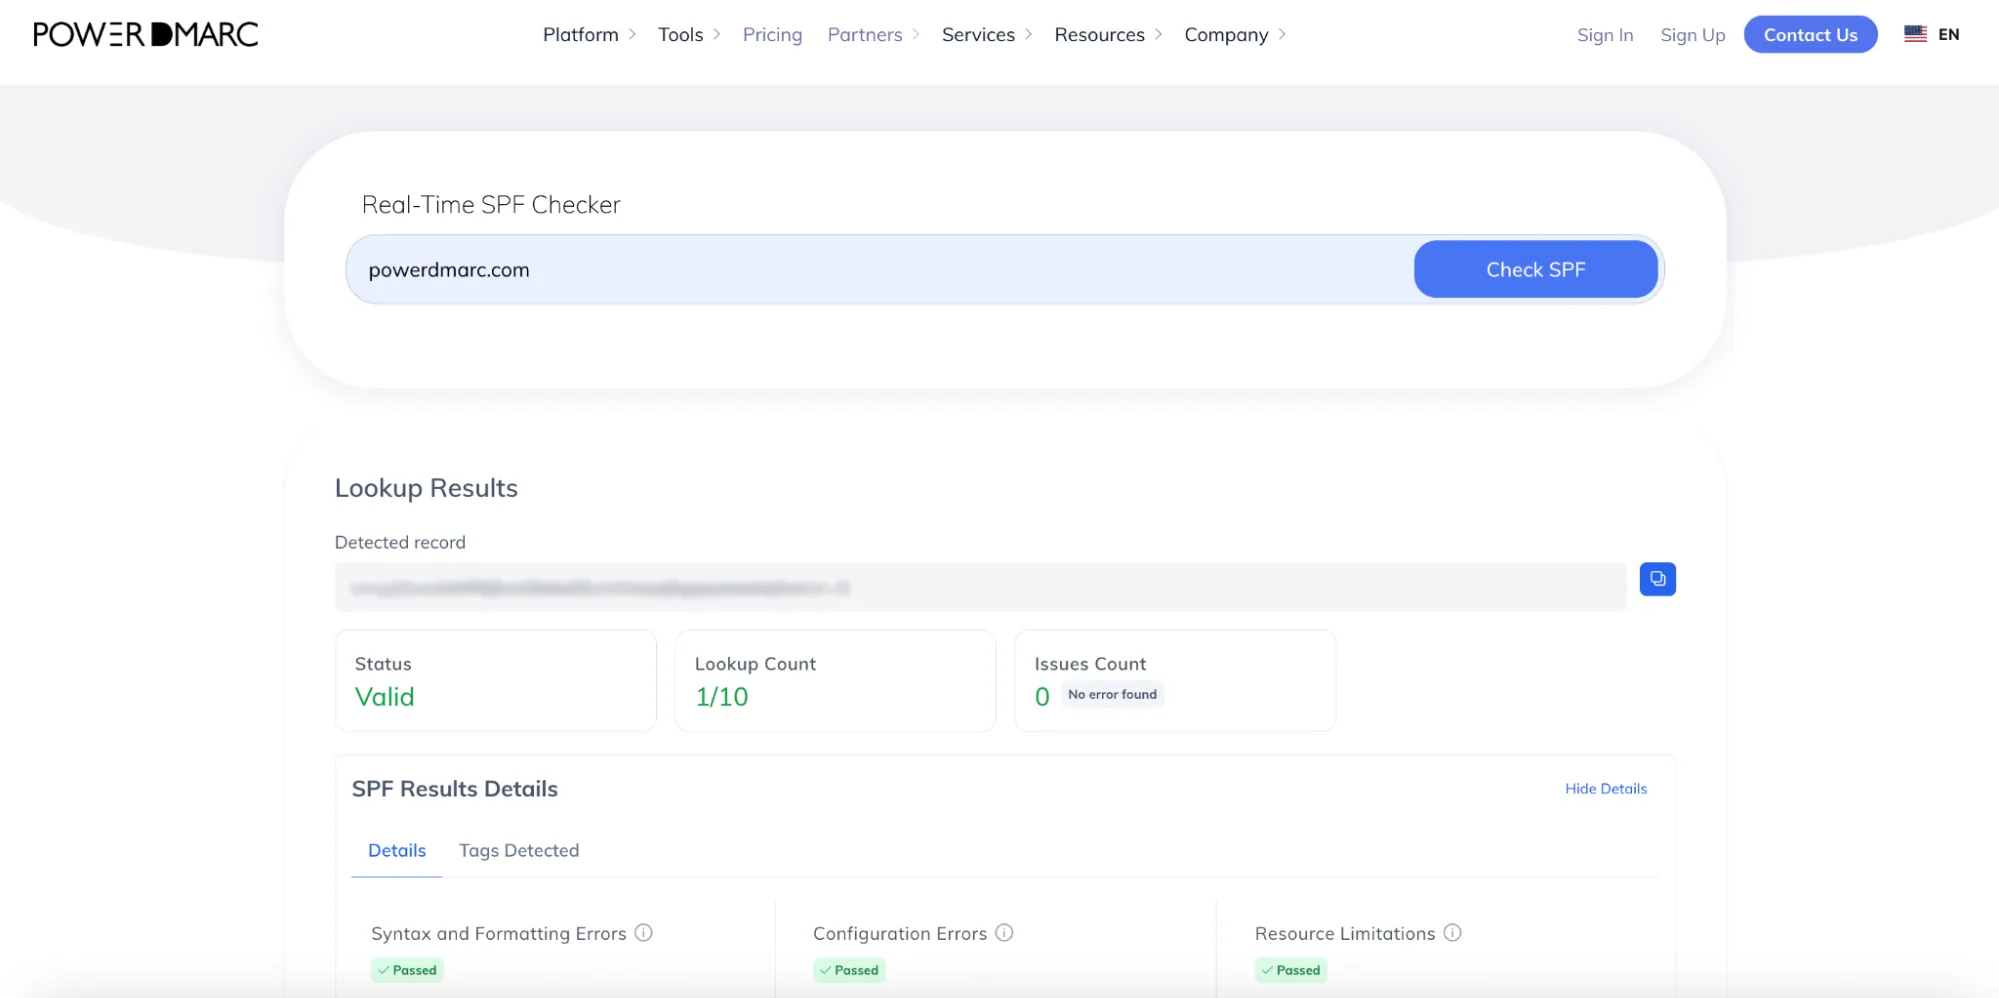
You will need to create two new CNAME entries in your DNS to handle DKIM encryption.
First Record (DKIM 1 CNAME):
Type: CNAME
Host/Name: happyfox1._domainkey
Target/Value (US): happyfox1._domainkey.happyfox.com
Target/Value (EU): happyfox1._domainkey.happyfox.net
Second Record (DKIM 2 CNAME):
Type: CNAME
Host/Name: happyfox2._domainkey
Target/Value (US): happyfox2._domainkey.happyfox.com
Target/Value (EU): happyfox2._domainkey.happyfox.net
(Note: Most DNS systems auto-populate your domain name, meaning the Host value only needs to be happyfox1._domainkey. If your verification fails later on, try explicitly including the domain name in the Host field, e.g., happyfox1._domainkey.yourdomain.com).
You can check the record itself with PowerDMARC’s DKIM checker.
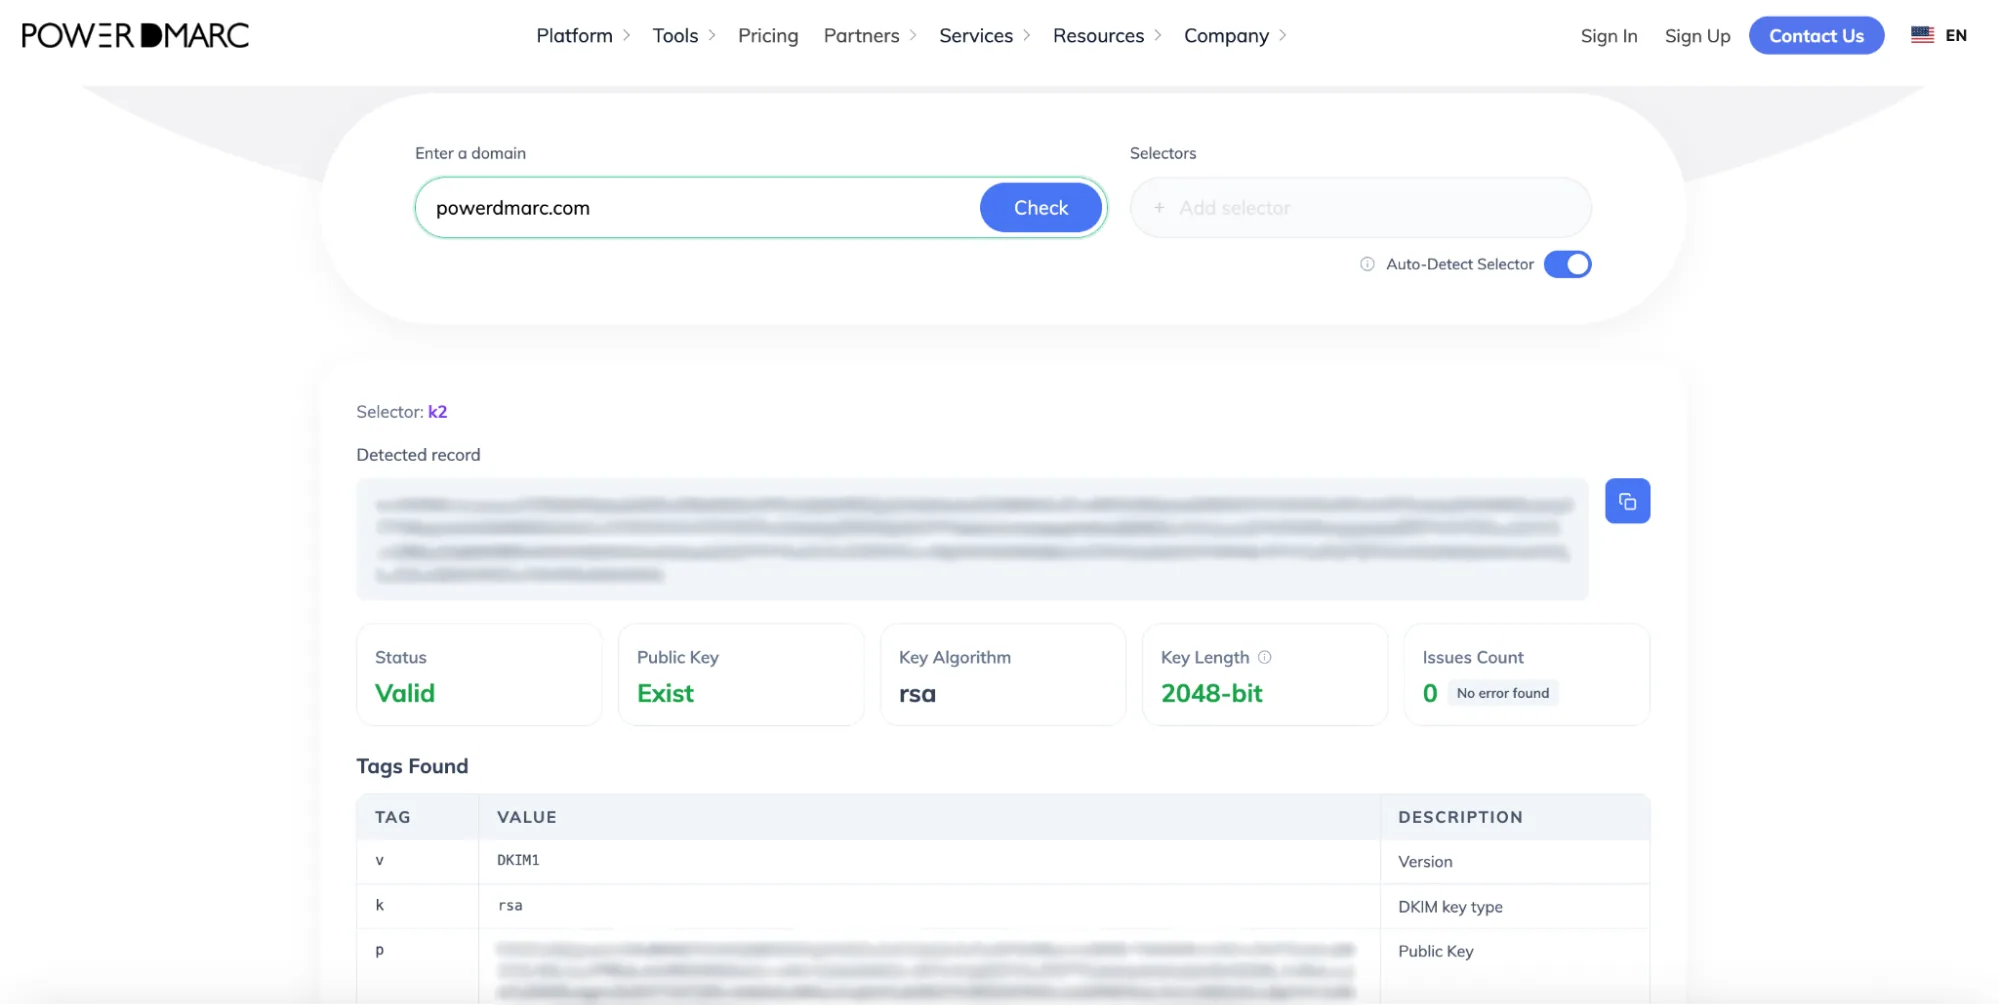
While HappyFox documentation provides a basic DMARC example, it doesn’t always mandate a reporting email attached to it. This means you would be flying blind; you won’t know if your domain is being abused or if any of your legitimate emails are failing authentication.
Instead of using a basic setup, we are going to generate a proper, comprehensive record using PowerDMARC’s free DMARC record generator.
1. Go to PowerDMARC’s Free DMARC Record Generator tool.
2. For the Policy, select p=none (monitor-only mode). This ensures nothing gets blocked initially, allowing you time to safely review your email traffic before moving to enforcement.
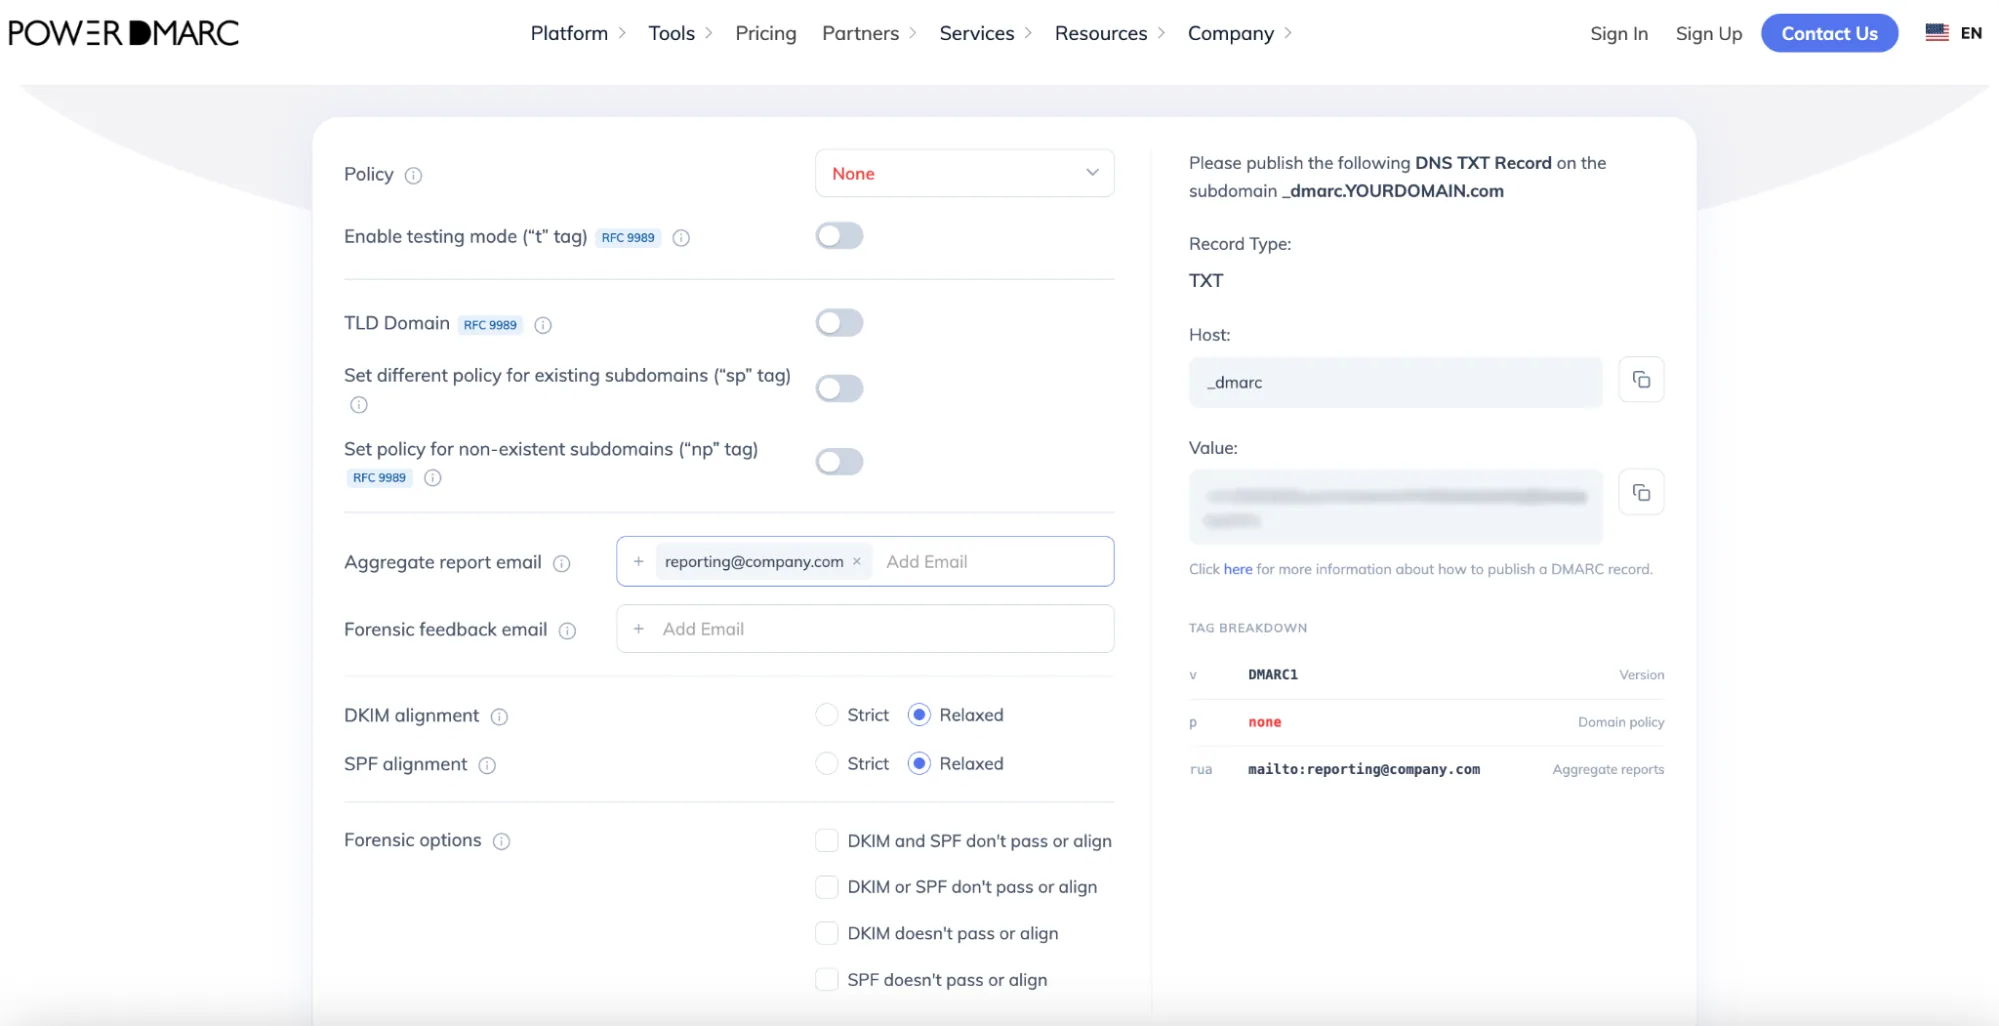
If you are confused about what p=none is and what the other policies are, here is a concise explanation:
Important: Jumping straight to enforcement risks blocking your own legitimate business emails (like invoices or marketing tools). Starting with p=none is essential to map out your mail flow and fix any authentication issues safely.
1. Add your dedicated email address to the Reporting field to receive your DMARC aggregate reports (rua).
2. Log into your DNS management console and add a new record:
3. Save the record.
Head back to your Happyfox account and navigate to Channels > Edit a channel. Click on the Verify Now button next to both the SPF Verification Pending and DKIM Verification Pending sections. After a successful verification, the alert icon will change to a Green tick icon.
If it fails initially, don’t panic! DNS propagation can take anywhere from a few minutes to 24 hours. Refresh or check back a bit later.
To guarantee that your configuration is fully accurate and active, follow these verification steps:
Use PowerDMARC’s free DMARC Record Checker to instantly verify that your record is published correctly.
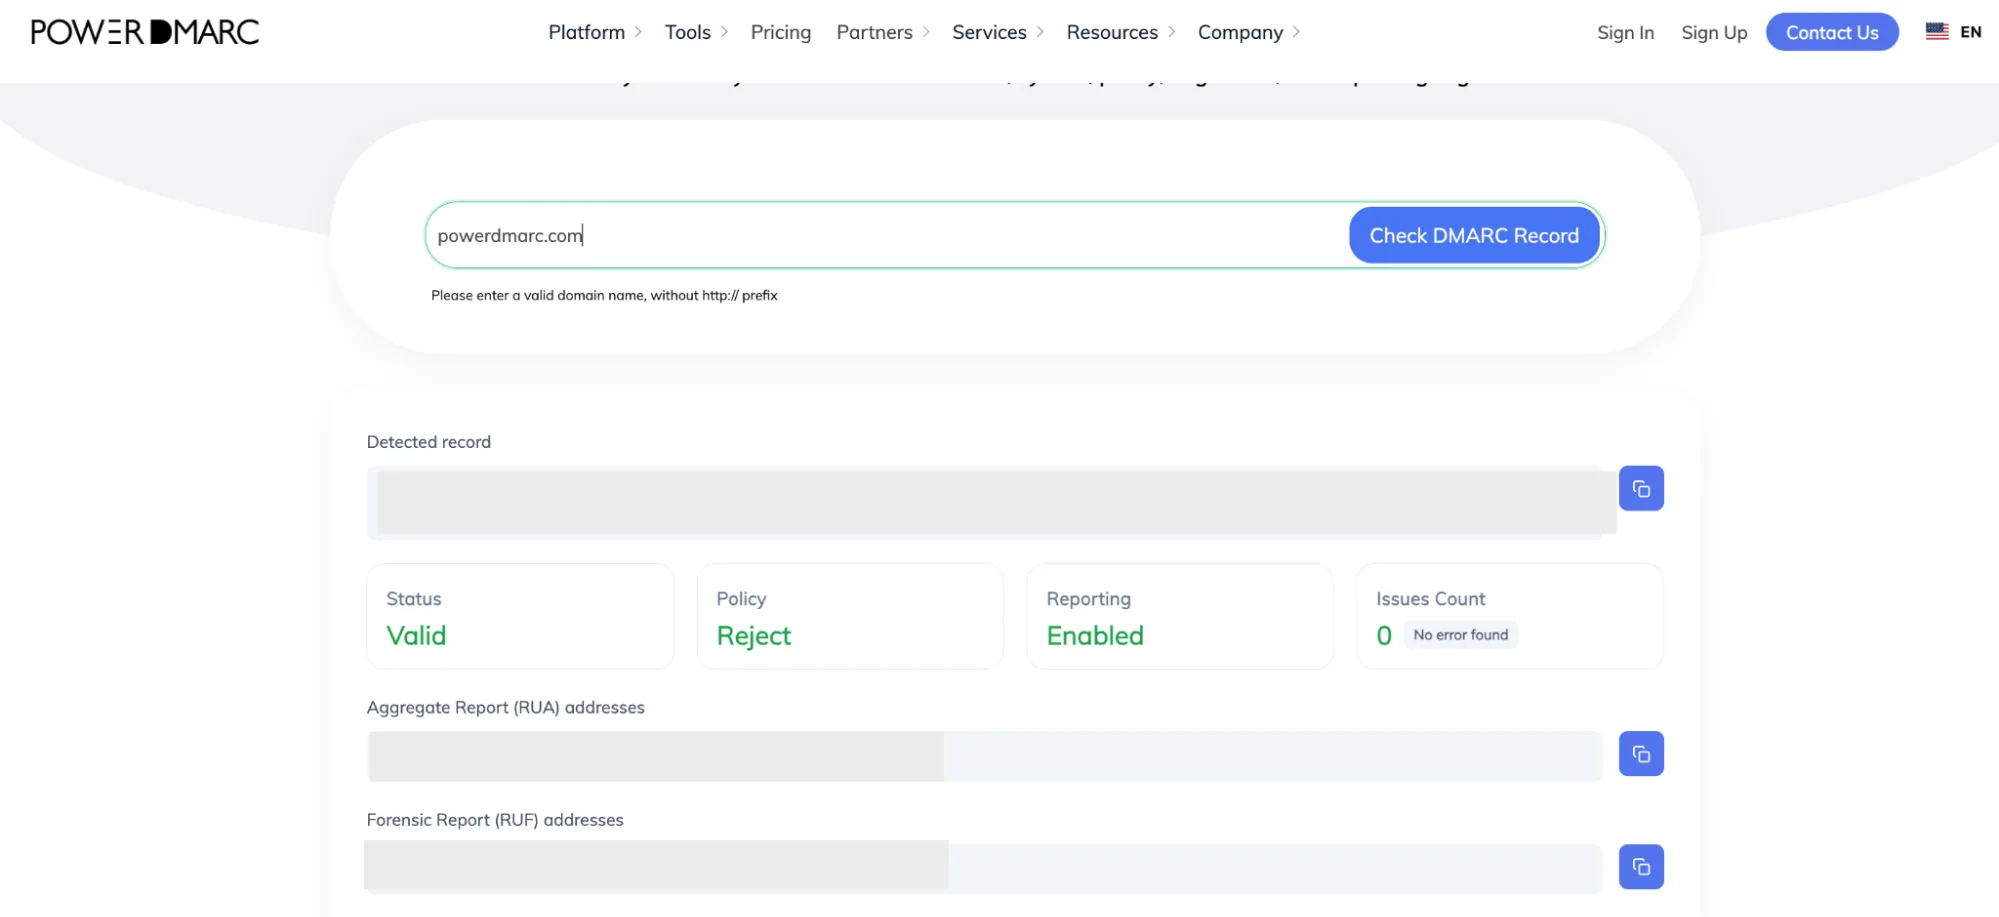
What to expect in your domain health results:
Note: If your total domain health score is lower than expected, it is likely because you haven’t yet deployed other additional security protocols like BIMI, MTA-STS, or DNSSEC.
For more information, you can head to Happyfox’s support centre.
If you want to take your email security further and move securely from p=none to DMARC enforcement, configure BIMI so your logo displays in your subscribers’ inboxes, and monitor your automated reports seamlessly, the PowerDMARC team is here to help.
Get in touch with us or sign up for a demo with PowerDMARC to experience the power of safer email communications firsthand!








 SSL vs TLS Protocols: What’s the Difference?