TinkMail DKIM, DMARC, and SPF Setup Guide

by
Last Updated:
5 min read

by
Last Updated:
Key Takeaways
If your business relies on TinkMail to manage your daily email communication, properly configuring your domain authentication is essential. TinkMail functions as your email identity verification system, ensuring that other mail servers recognize your messages as legitimate and trustworthy.
Setting up proper email authentication (SPF, DKIM, and DMARC) ensures your domain is protected from spoofing. Without these records in place, your business emails run a high risk of landing in spam folders or being blocked entirely.
Proper DNS configuration is the foundation of secure business communication. When you accurately configure the necessary security protocols for your TinkMail account, you will see immediate benefits:
To begin the setup process, you will need access to your domain registrar’s DNS management panel (such as GoDaddy or Namecheap) and the specific values provided by TinkMail.
An SPF record tells other email systems which servers are authorized to send email from your domain.
If you do not have an existing SPF record, log into your DNS management panel and create a new TXT record:
Note: You must replace "example.com" with the specific domain name provided to you by TinkMail. If you already have an SPF record for other services, do not create a second one. Contact TinkMail support for help merging the records safely.

DKIM adds a digital signature to your emails, proving they genuinely came from your company and were not tampered with during transit.
TinkMail generates a unique DKIM record for your domain. Your account manager will provide you with the exact selector and public key. Add it to your DNS as follows:
Simply copy and paste the values exactly as provided by your TinkMail account manager and save your changes.
You can check the record itself with PowerDMARC’s DKIM checker.
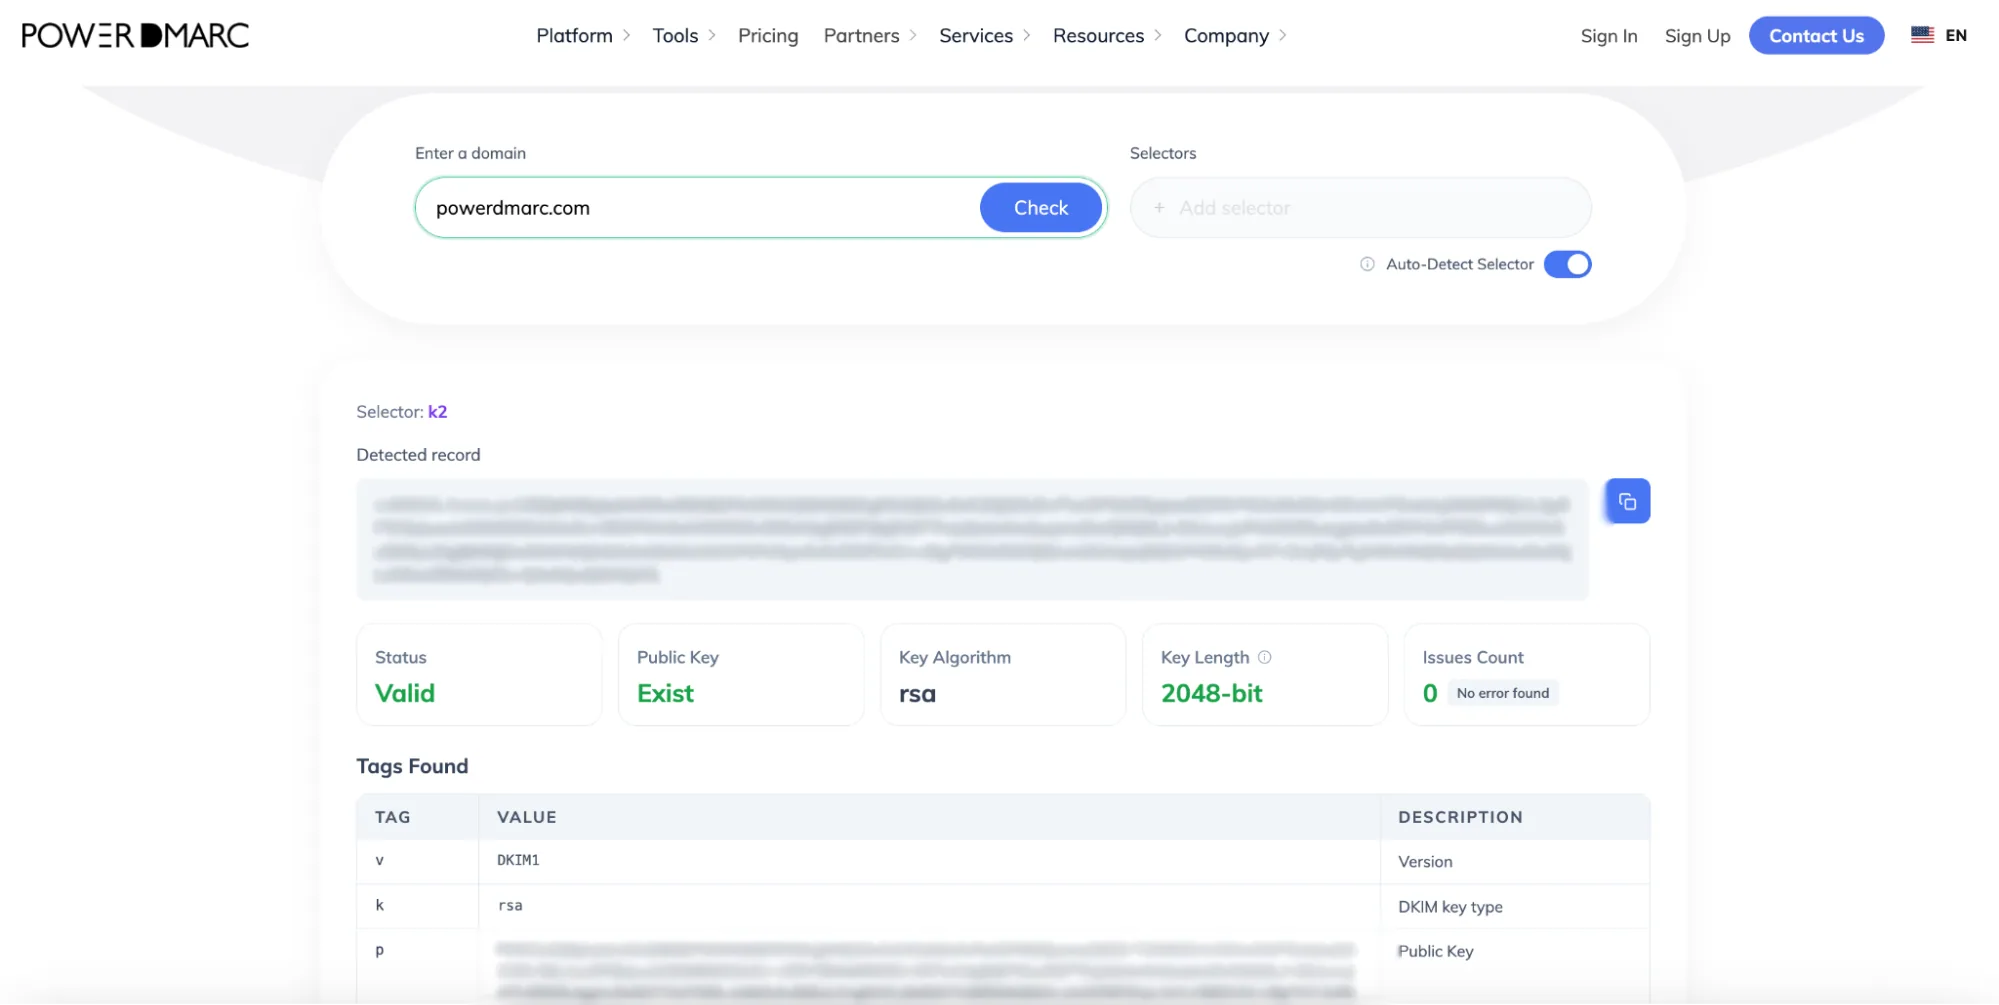
For more information, you can refer to TinkMail’s DNS record configuration guide.
You should ensure you have a DMARC record published. Without reporting enabled, you won’t know if your billing emails are failing authentication or if bad actors are spoofing your brand.
Instead of guessing, use PowerDMARC’s free DMARC record generator to create a comprehensive record.
1. Go to PowerDMARC’s Free DMARC Record Generator tool.
2. For the Policy, select p=none (monitor-only mode). This ensures nothing gets blocked initially, allowing you time to safely review your email traffic before moving to enforcement.
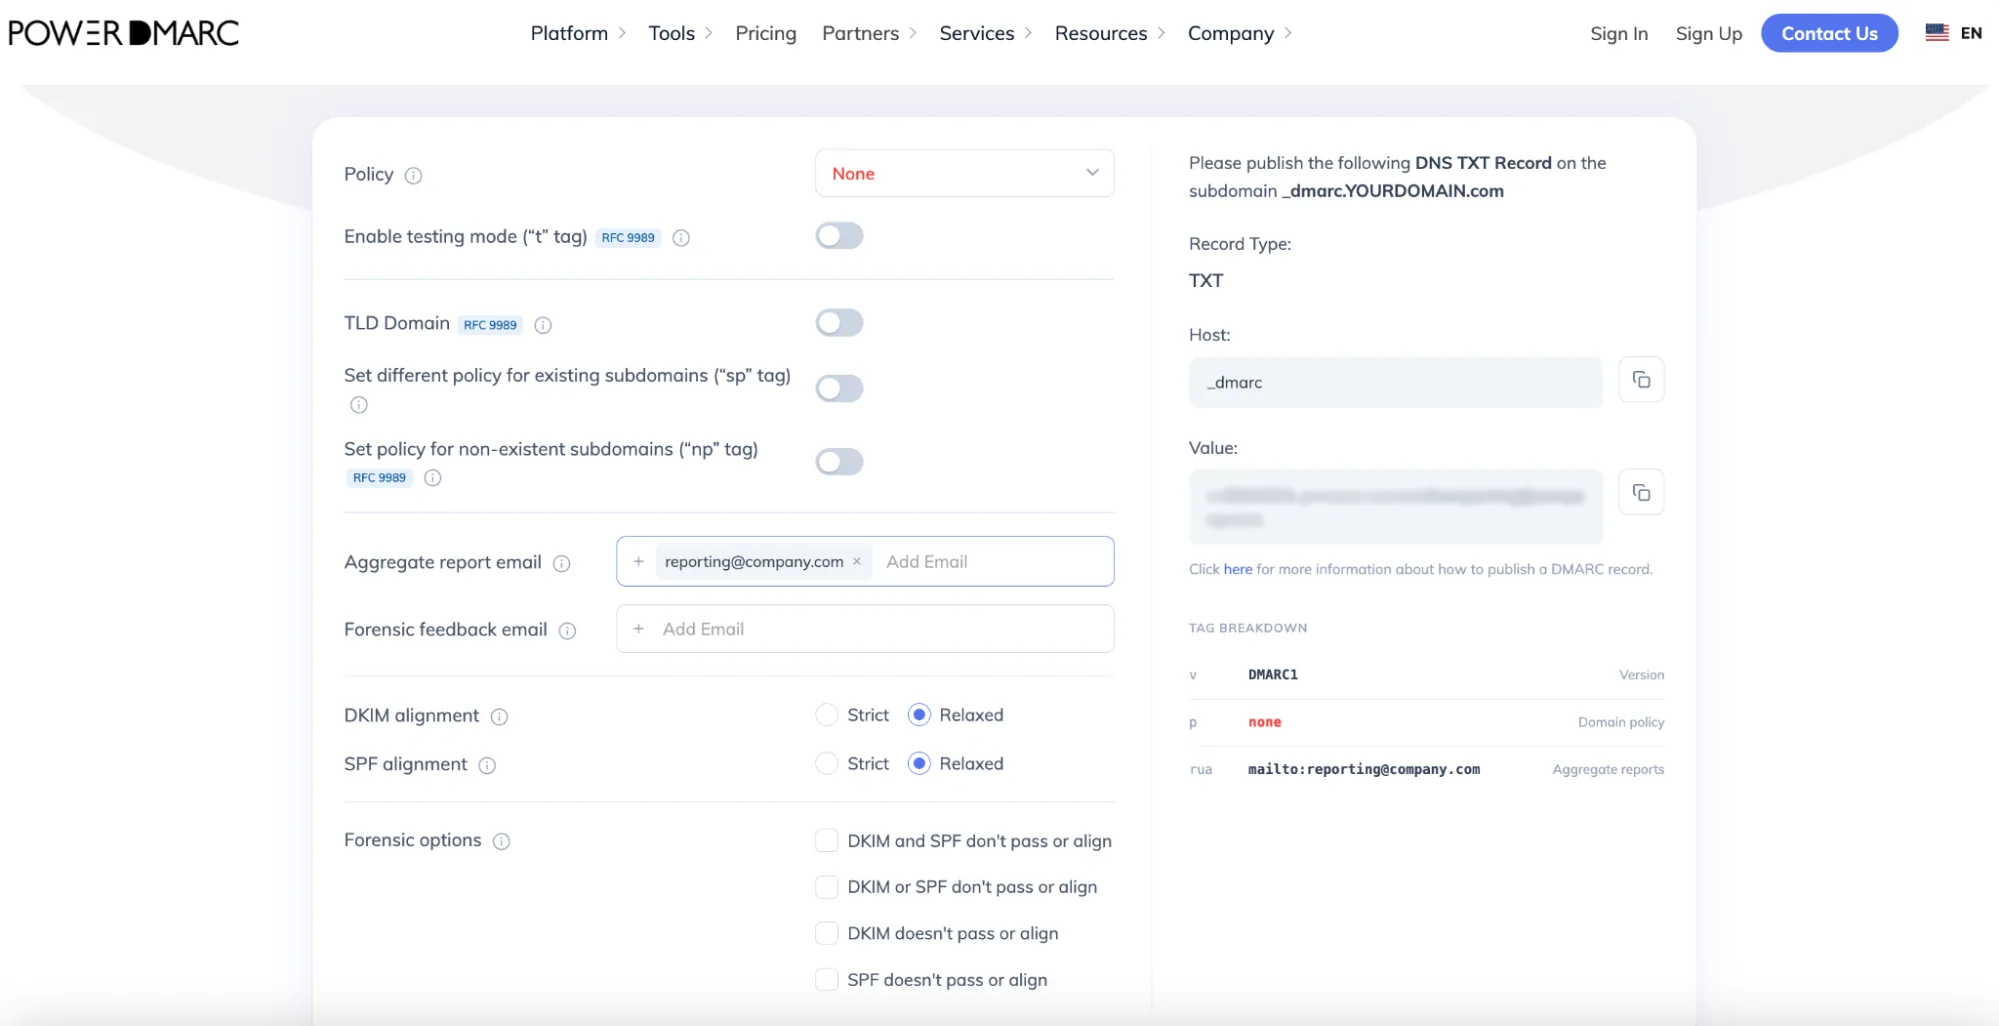
If you are confused about what p=none is and what the other policies are, here is a concise explanation:
Important: Jumping straight to enforcement risks blocking your own legitimate business emails. Starting with p=none is essential to map out your mail flow and fix any authentication issues safely. However, staying at p=none for too long is not recommended as it leaves your domain vulnerable to phishing and impersonation threats. Move to an enforcement policy as soon as you are confident with your setup.
1. Add your dedicated IT or security email address to the Reporting field to receive your DMARC aggregate reports (rua).
2. Log into your DNS management console and add a new record:
3. Save the record.
Step 1: Send a Test Document
After adding the DNS records and waiting for propagation, send a test email to an external address. Check if the email arrives in the inbox and not the spam folder. You can also contact the TinkMail support team if you need help verifying your setup.
Step 2: Run a Final Check with PowerDMARC
To guarantee that your DNS configuration is fully accurate and active across the globe, run an automated check:
Use PowerDMARC’s free DMARC Record Checker to verify that your record is published correctly.
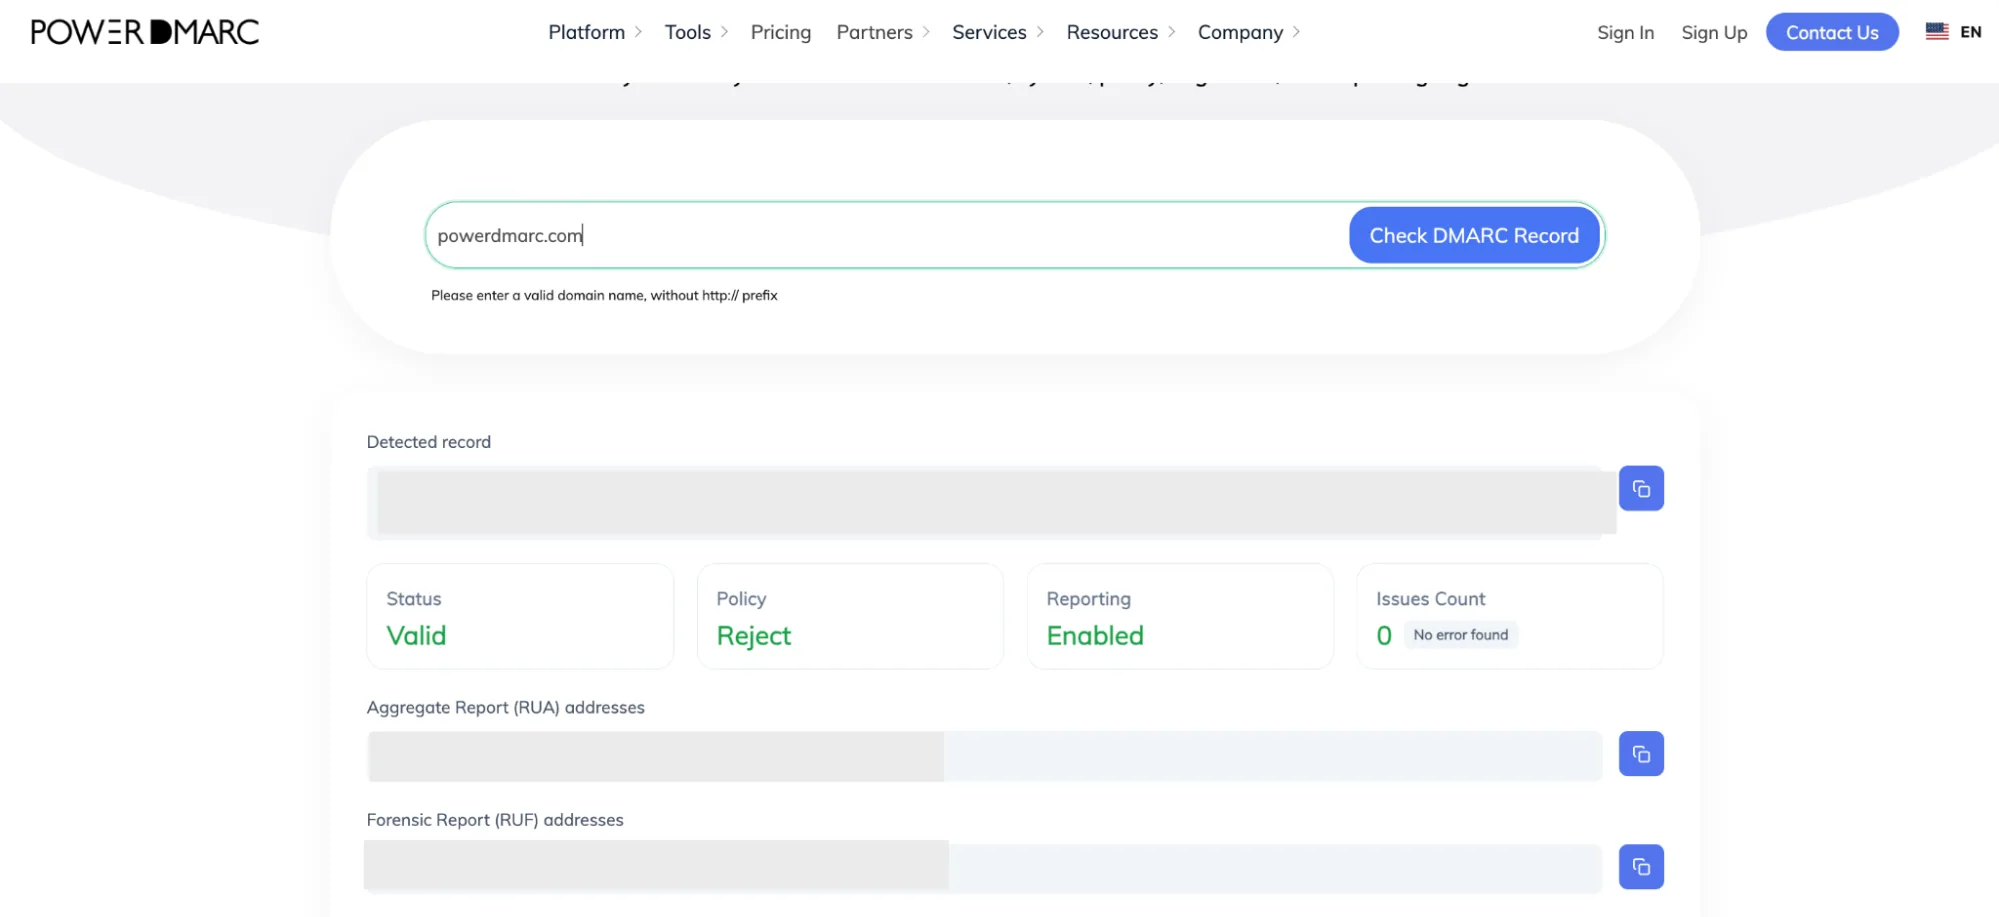
What to expect in your domain health results:
Securing your business email infrastructure is critical for maintaining professional trust and protecting your clients from fraud. If you want to take your email security further, move securely from p=none to DMARC enforcement without disrupting operations. Configure BIMI to display your logo in the inbox, and monitor your automated reports seamlessly. The PowerDMARC team is here to help.
Get in touch with us or sign up for a demo with PowerDMARC to experience the power of safer email communications firsthand!







 What Happens When AI Chatbots Leak Internal Business Data?